Here is mine:
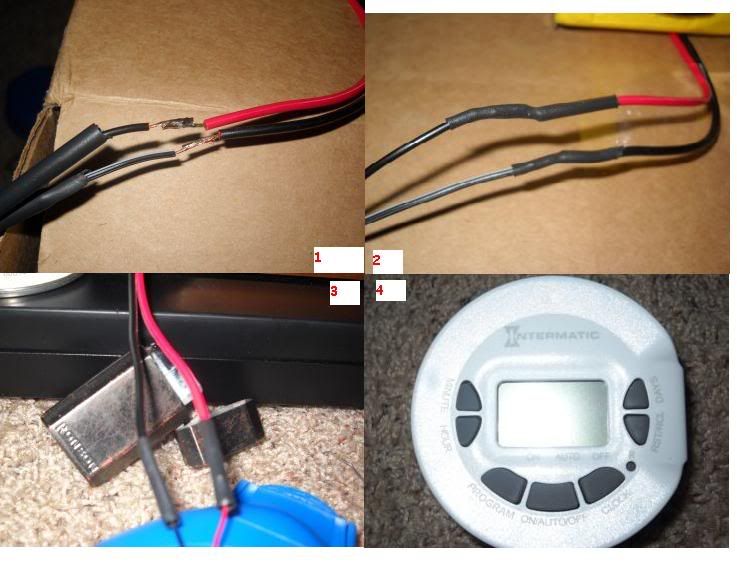
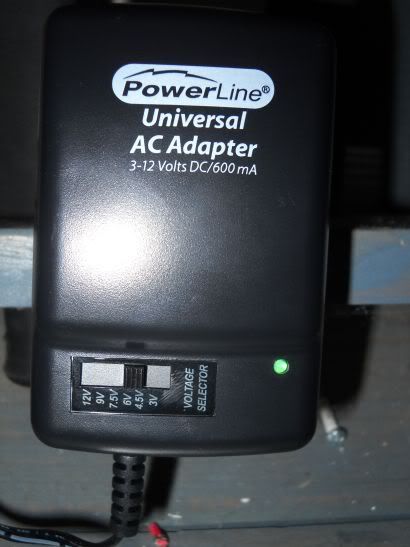
1. I got an AC variable voltage convertor from Walmart for about $14. (See 2nd to last pic) I cut the end off & stripped back the insulation from the AC adapter and the wires I had previously ran through the drain of the Vino. The wire with the white stripe is the ground which will be soldered to the black wire running from the fan.
I got an 8pk of various diameter 4" length heatshrink tubing from Lowe's for $1.98. Cut with scissors (knives do not work,
use scissors) and slide the heat-shrink tubing over one wire. You don't need much, just enough to cover the joint and a little more for the sides. Solder the joints together for a good connection.
A soldering gun from Radio Shack with a small starter kit is only $10. I had one but lost it, so I grabbed another one.
Soldering irons are hot and can burn you and anything else the business end comes in contact with! Helpful hints: make sure to test your connections before you heatshrink them and to put the heatshrink tubing on one side of the joint before you solder the connection.
2. I found another good use for a Jet Lite....... Heat source! If you don't have a heatgun a butane lighter will work just as good. Slide the tubing over the seal, and heat with the lighter. You don't want to get too close to the tubing or
it will burn/melt. It only takes a second to seal the deal. I went from one in to the other to avoid any wrinkles or creases on the tubing.
3. Now the wires in the Vino (ran through the drain) are to be stripped. Slide the heatshrink tubing to one set of wires and solder the wires together (the fan & the power supply wires ran through the VIno drain). Heat the heatshrink tubing with my Jet-lite and that is done.
The black wire with the white stripe from the convertor to the black wire ran from the fan. The red wire from the fan to the solid black wire from the convertor.
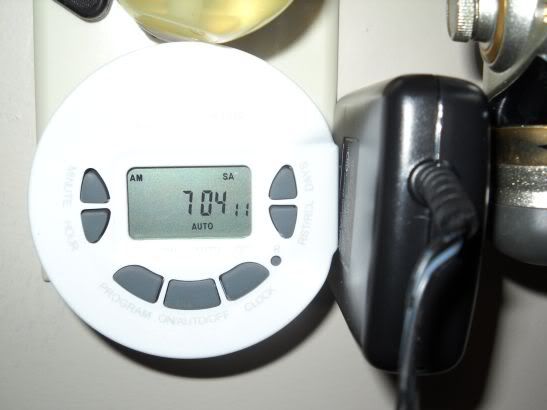
4. I bought a digital timer that as 20 on/off times for $9 at Lowe's. You can program it down to on for only one minute or for however long you want. Even by the days/weekends which is pointless for what I am using it for. The timer is an Intermatic DT300
 5.
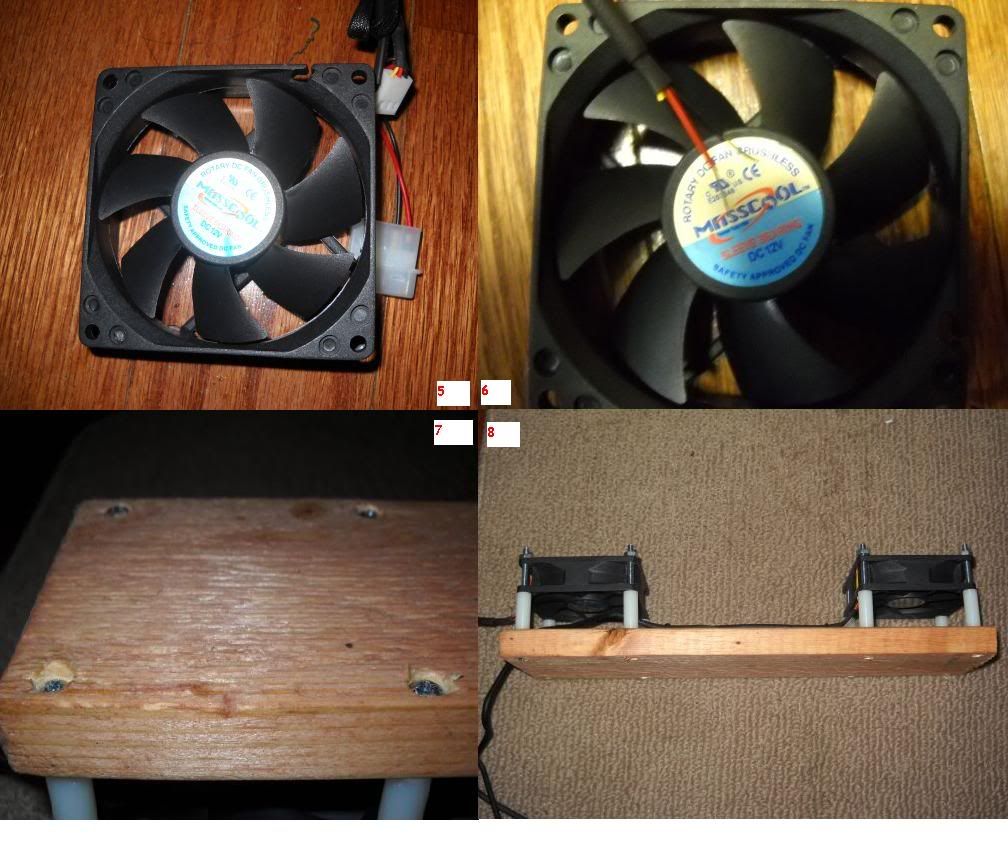
5. I got two 80mm fans from Newegg.com for $1.49 each.
http://www.newegg.com/Product/Produc...82E16835150007
6. I cut the connectors off the end of the wires and stripped off the insulation.
The yellow wire is not used. When connected to your computer, it tells the fan controller how fast the fan is spinning. I just cut it back father off into the braided jacket that covers the wires.
7. I had a scrap piece of 1x4 and cut it to about 14" long. I sanded it on all sides and put a rounded edge on it for looks. I then put two coats of stain on it. Stain,wait 15 mins, wipe off excess, stain, wait 15 mins, and finally wipe off excess and let dry.
Later on I will use a piece of Red Cedar so it will match the drawer fronts. Basically this is a temporary piece to see how it works and what bugs need to be worked out.
I set the fans where I wanted them on the board and made small pilot holes for the machine screws I got to go through to attach the fans to the board with. Then I took a #8 countersink bit and made some counter sink holes so the heads of the screws will not stick out on the bottom of the board.
I got 8- #8x3" Round head machine screws, nuts, and 1" nylon spacers. Put the screws through the board with the head on the bottom of the board in the countersink.
8. Then turned the board over, put on the 8- 1" spacers, sat the fans onto the screws, put the nuts onto the screws, and tightened them down. The spacers allow for air movement.
 9.
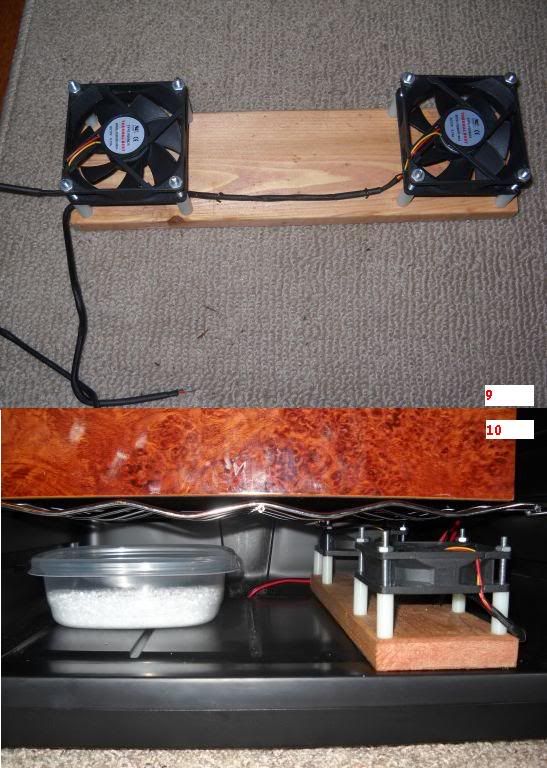
9. I ran the wire from one fan to the next fan and Cut them off at the same length. I soldered the red wires together and the black wires together. I then had some small metal hammer in stapples and put two down over the wires on the board to stop them from moving around too much.
3. (pic used again) Solder the wires to the fan from the line ran through the drain and heat shrinked the joint.
Helpful hints: make sure to test your connections before you heatshrink them and to put the heatshrink tubing on before you solder the connection.
11. Here is the
temporary set-up till I change the wood to a piece of stained Red Cedar.
I have to secure the wires somewhat better, one set rose up and stopped a fan.
I chose to run one in the front and one in the back to push the humidity towards the middle and top layers.
 Any questions/ comments I'm willing to answer/listen!